- CSS stands for Cascading Style Sheets.
- It is used to style HTML elements (like changing colors, fonts, layouts).
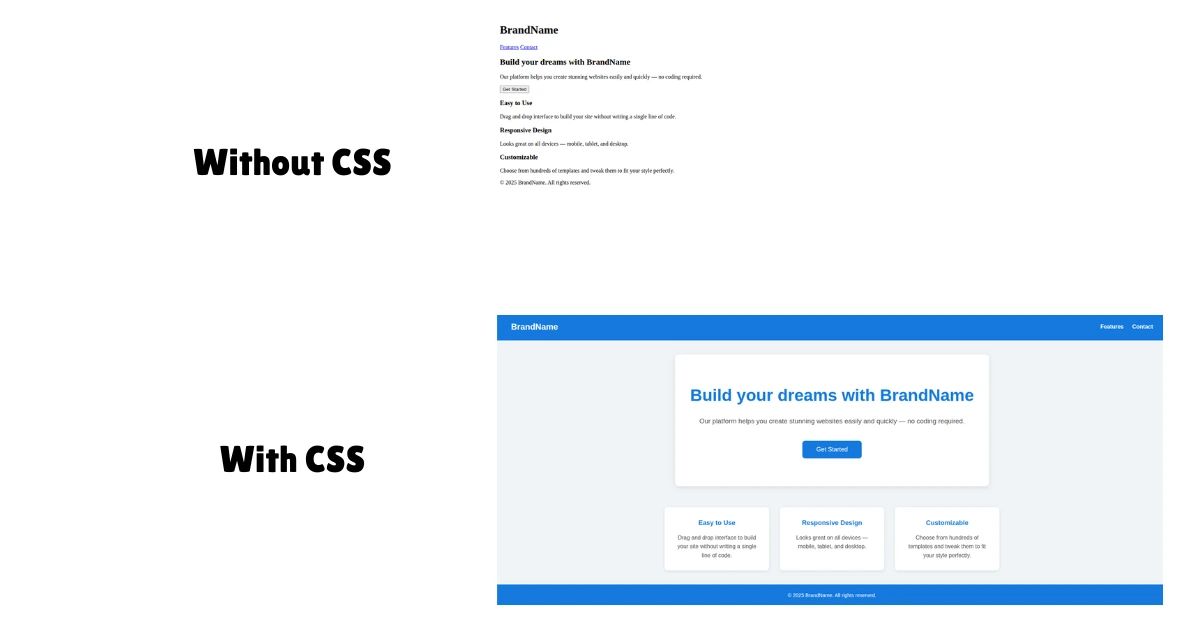
- Without CSS, websites would look plain and boring.
- CSS makes websites beautiful, organized, and user-friendly.
For example:
HTML adds text:
<h1>Hello</h1>CSS changes how it looks:
h1 {
color: blue;
font-size: 30px;
}
Syntax and Structure
CSS has a simple pattern:
selector {
property: value;
}- Selector: Picks the HTML element(s) you want to style.
- Property: The style aspect you want to change, like color, font size, margin, etc.
- Value: The specific setting you want for that property, like red for color or 16px for font size.
Example:
p {
color: red;
}pis the selector, meaning it targets all<p>(paragraph) elements in the HTML.coloris the property, which controls the text color.redis the value, so all paragraph texts will be colored red.
Adding CSS to HTML
There are three main ways to add CSS to HTML:
- Inline CSS
- Internal CSS
- External CSS
Inline CSS
Inline CSS is written directly inside an HTML element’s style attribute.
For example:
<p style="color: blue; font-weight: bold;">
This text is blue and bold.
</p>Here, the style attribute contains CSS declarations that apply only to this specific paragraph.
When to Use Inline CSS
- For very small, specific style changes.
- For testing or debugging quickly.
- Overriding other CSS rules for a particular element.
Why It’s Not Recommended for Larger Projects
- Mixing style with HTML makes code harder to read and maintain.
- It’s not reusable.
- It breaks the separation of concerns (HTML for structure, CSS for styling).
Use inline CSS only for quick, temporary tweaks.
Internal CSS
Internal CSS is placed inside a <style> tag within the <head> section of your HTML file.
For example:
<!DOCTYPE html>
<html lang="en">
<head>
<title>Add CSS to HTML - Learnify</title>
<style>
p {
color: blue;
font-weight: bold;
}
</style>
</head>
<body>
<p>This text is blue and bold.</p>
</body>
</html>The CSS inside the <style> tag applies to the <p> tag of the whole page.
When to Use Internal CSS
- For styling a single page without external files.
- When styles are short and specific to that page.
Limitations
- It can become messy if there’s a lot of CSS.
- Styles cannot be shared across multiple pages easily.
- Still mixes styling with HTML structure.
Internal CSS is good for small projects or learning, but not ideal for larger, multi-page projects.
External CSS
External CSS is written in a separate .css file and linked to your HTML using the <link> tag.
This is the most common and recommended method for real projects.
For example:
styles.css:
p {
color: blue;
font-weight: bold;
}index.html:
<!DOCTYPE html>
<html lang="en">
<head>
<title>External CSS - Learnify</title>
<link rel="stylesheet" href="styles.css" />
</head>
<body>
<p>This text is blue and bold.</p>
</body>
</html>The <link> tag connects your HTML to the external CSS file named styles.css.
Always make sure the path in href matches your actual file structure.
Common ways to write the href:
href="styles.css": The file is in the same folder as your HTML.href="css/styles.css": The file is inside a folder named CSS.href="../styles.css": The file is one folder up from the HTML.href="https://...": Loads from an external URL or CDN.
When to Use External CSS
- For any real or multi-page project.
- When you want to reuse styles across many pages.
- For better organization and maintainability.
Benefits
- Keeps HTML and CSS separate, easier to read and maintain.
- CSS files can be cached by browsers, improving load times.
- Enables using advanced tools, frameworks, and methodologies.
👉 Next tutorial: CSS Selectors